Data Conversion Software » Recover Data
How to Install & Configure MS Outlook Client?
How to Install & Configure MS Outlook Client?
Installation & Configuration of MS Outlook before starting Recover Data for EDB to PST, Recover Data for OST to PST & Recover Data for NSF to PST.
Using our Data Conversion Software may some message appear on your screen when
- You do not install MS Outlook OR
- Do not configure account properly in MS Outlook.
Appeared Message »
- "Outlook NOT installed/configured properly."
This message appears because of the following reasons:
- Outlook not installed
- Outlook is not configured for POP3 account
- Outlook is configured for IMAP
- Outlook is configured for Exchange
- You have deleted the PST files from system without closing them from Outlook
If you are facing any of the above situations, then you must configure a new POP3 Outlook profile.
How to Configure New POP3 Profile in Outlook?
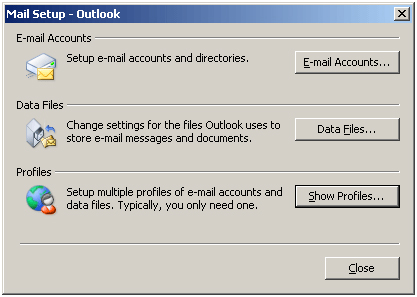
Go to Start » Settings » Control Panel, then double click on Mail icon, then following window will appear:
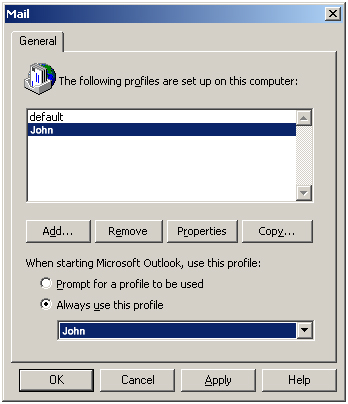
- Click on the Show Profiles button.
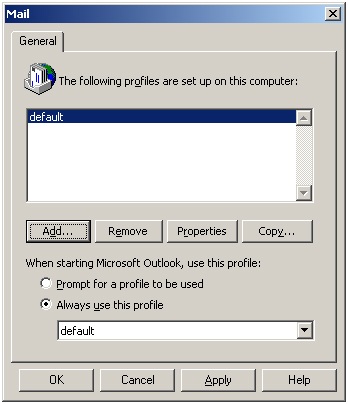
- A appear screen shows you various configured profiles on your machine. If not then a preinstalled profile (default) by Windows has appeared in this screen. You can ignore this. Click on the Add button to create a new profile.
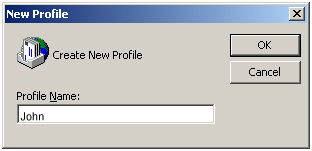
- Put any Name under "Profile Name" & click OK
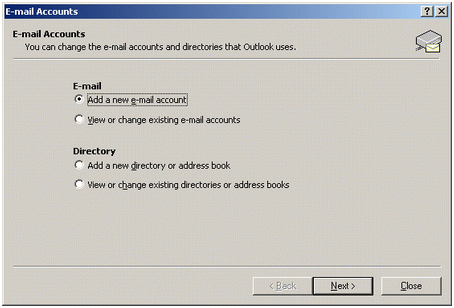
- Click on Add a new e-mail account and click on Next.
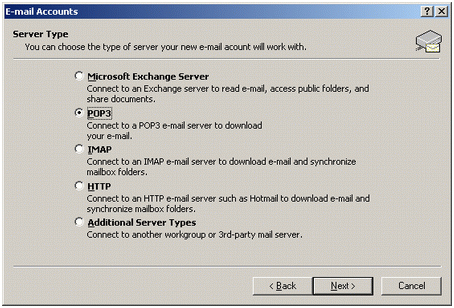
- Select the POP3 option and click on Next.
- Fill out all the required information. Either give your email account address or give any dummy email account address like we have used a dummy account (john@recoverdatatools.com) and a dummy POP3 incoming/outgoing mail server as recoverdatatools.com.
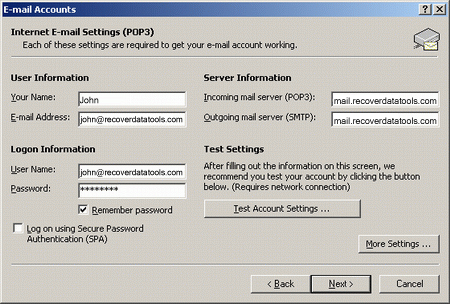
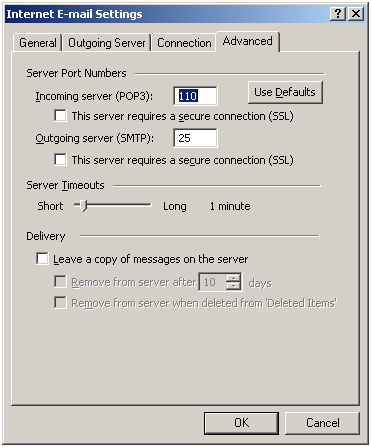
- In this window, you may wish to enter a different reply E-mail address. If not, leave it as your Test E-mail address. When you are done, click on the advanced tab.
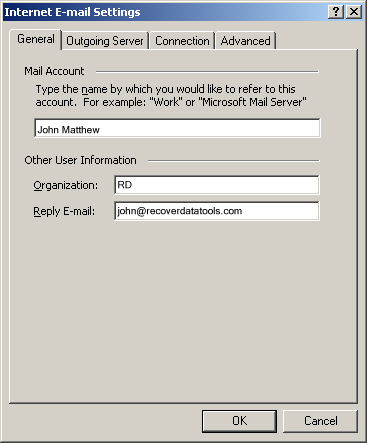
- Make the exact setting & click on OK
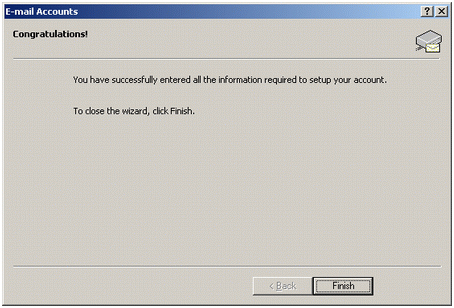
- After complete all the settings & test. An alert window appears & it alerting you that you make a successful setup of a new account. Click on Finish:
- When you are returned to this window, make sure the button, Always use this profile is selected and the name of the new profile, (john in this example), is shown in the field at the bottom of the window. Click OK.